When setting up your Moodle site, you may want to consider how long courses will live and how you will “roll” them over, which means making them ready for a new cohort.
Edit: We created a plugin to assist with setting enrolments to manual for archived courses. I’ve updated that part of our process below.

It is possible to leave courses in place and simply reuse them, but I wouldn’t recommend this as courses can accumulate a lot of mess over years, both in content and settings. Moodle’s backup, restore and import processes are set up to easily copy courses, adjusting to new timelines. Our approach is to create a new copy of courses for each teaching period. This also affects how we name and organise our courses.
Keeping a version of each past course, as it was taught, means teachers and students can remain enrolled in that course for years, referring back to it over time. Recreating courses means the teacher only has to focus on the current instance and not worry about maintaining historical activities and resources. It also doesn’t greatly increase storage as Moodle’s file management transparently keeps a single copy of files that might be used in multiple courses.
We roll-over our academic and sports courses every six, 12 or 24 months, depending on the length of the courses. Our roll-over process relies on feeding a number of spreadsheets into Moodle admin tools. One optional added tool is the Upload Course Categories tool.
Our roll-over process therefore has three stages: preparation of spreadsheets (CSV files), using these to execute course changes and make copies (as well as a few manual changes) then a clean up of the results while the system continues to be used.
Preparation
Once you have set up the following spreadsheets once, reusing them with new details is very easy. We use a collaborative Google Sheet and then export sheets as CSV files when we need them.
- Prepare a CSV file containing a list of categories that will contain courses that will be rolled over. Include the following fields: idnumber, name, description
- The new categories will reflect the structure of the current categories, but will be rooted at a category for the past year (eg 2019).
- The idnumber and description fields can be empty, but must be present as columns
- The name field includes the path with forward slashes (/) between levels, eg “2019/Senior School/Senior Academic/IBDP”
- See this repo for more field info
- Prepare a CSV file containing a list of current courses that will be rolled over with the following fields: shortname, enddate
- The shortname is used as the identifier for the course to be updated
- The enddate will be in the format DD.MM.YYY eg 31.12.2019
- See this doc for more field info.
- Prepare a CSV file containing a list of new courses with the following fields: shortname, fullname, idnumber, category_idnumber, format, showgrades, templatecourse
- The shortname and fullname should follow the format described using the naming convention (see ours).
- The idnumber will match the course in the SIS.
- The category_idnumber is the target category ID (we use short words for these codes).
- The format is the course format. We use tiles for academic courses.
- The showgrades controls whether grades are shown; the value will be 1 for academic courses and 0 for other courses
- The template course will be the idnumber of the previous instance of the course you will be rolling over (copying).
Execution
As this affects users’ experience, it needs to be done out-of-hours and relatively quickly, so be prepared. You may want to try this a test system first to ensure you get it right. The critical bits are done in maintenance mode.
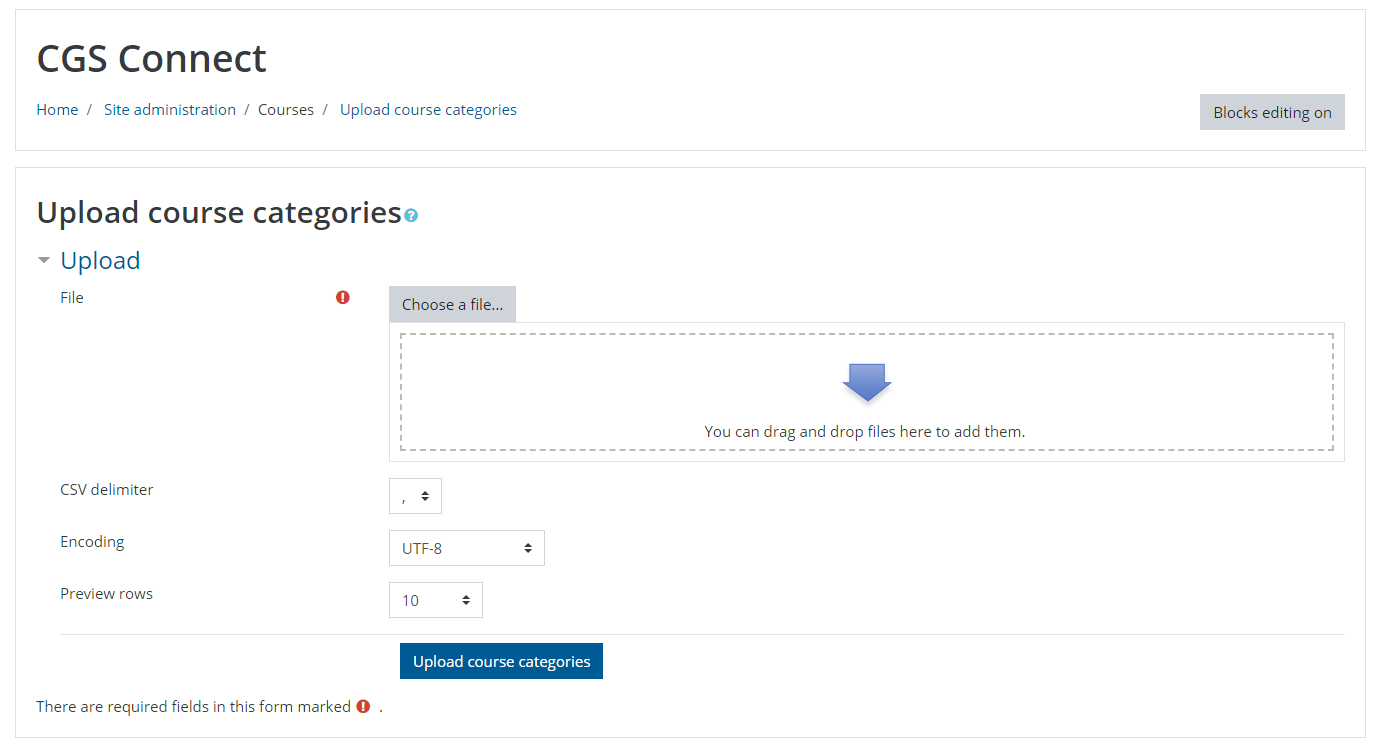
- Create the roll-over categories using by uploading the first CSV created earlier (the list of categories) to Site admin > Courses > Upload course categories (or create the categories manually if this plugin is not installed).
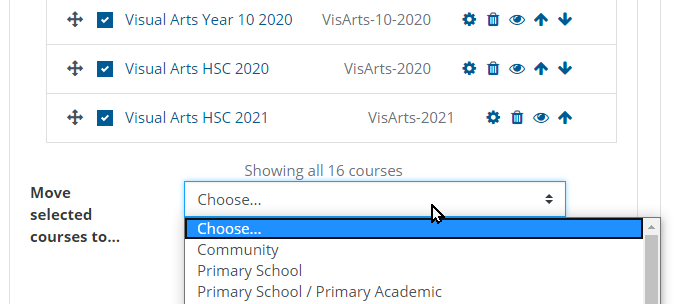
- Manually move each course that is being rolled over into its corresponding roll-over category (under the year category). You can do whole categories of courses at a time.
- Put the site into Maintenance mode in Site admin > Server > Maintenance mode.
- Wait for a minute to ensure any cron jobs are completed.
- Create new courses, copying old courses, by uploading the third CSV you created earlier (the list if new courses) to Site admin > Courses > Upload courses (this copying may take a while). If you have a large number of courses, you may want to do this in batches.
- Set end dates for rolled-over courses by uploading the second CSV you created earlier (formerly the current courses) to Site admin > Courses > Upload courses.
- Check that courses are in place and set up.
- Freeze the year level category (assumes freezing is enabled at Site admin > Development > Experimental settings)
- Take the site out of Maintenance mode.
Clean up
The following can be done while the system is in use, but shouldn’t be delayed.
- Make the teacher and student roles in archived courses fixed by setting them to manual (if you used DB syncing). We created a admin tool plugin to allow us to change/fix roles.
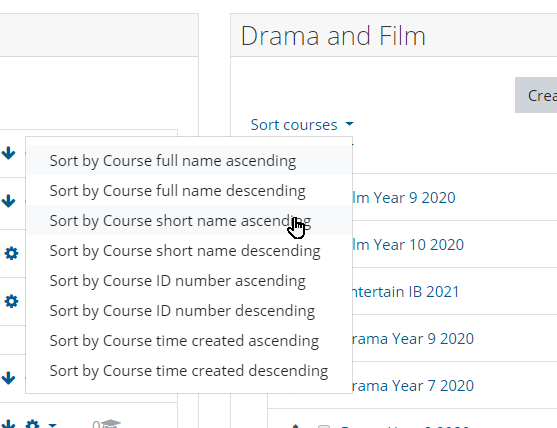
- Sort the courses in each category by short name ascending. Check this makes sense and possibly re-order courses into a more logical order (eg, Pre-S, Pre-K, K, 1…) if necessary.
- Copy any course images to the new courses. These don’t come across in the course copy.
One thought on “Our Course Roll-over Process”